

Being productive with your email is a result of many factors. But let's face the truth: it's quite difficult to be efficient at email if you receive thousands a day.
In the past, I was also trying to find valuable and actionable emails amongst all my email chaos, so, what did I do? – I started to heavily use a feature called Gmail filters.
What are Gmail filters?
Gmail filters are simple rules that automatically take the actions we desire on our emails based on certain conditions. You can create rules based on who sent the email, if it has attachments or not... And then decide from a variety of actions such as skipping the inbox (archiving them), marking them as read, labeling them, etc...
Let's look at this extra-simplified example:
If subject="Urgent", add label="Urgent"
Quite straight-forward, isn't it? You can customize all the conditions and actions, so it's a powerful weapon for keeping your inbox tidy and efficient.
How to set up your own filters
- Go here (Gmail > Settings > Filters)
- Click on "Create a New Filter"
- Select the conditions for your filter
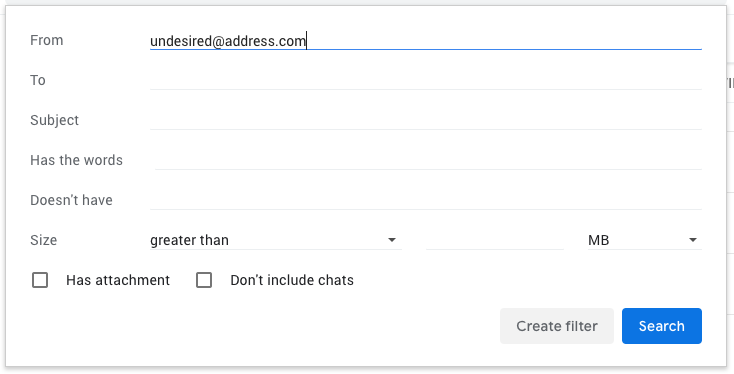
- Decide what Gmail should do with those emails

You can modify these filters at any time by accessing your settings.
I have more than 15 filters set up, most of them for transactional emails from known services I use on a daily basis which I automatically archive. This keeps my Gmail inbox cleaner than ever. With a clean inbox it's easy to focus on the emails that matter and work on the important stuff.
I've seen how my email response time went down by 3 hours thanks to this! Of course, I measured my response times with Email Meter, which you can try for free here.
Are you using filters in your Gmail inbox?
PS: Official documentation for Gmail Filters can be found here.


